
Welcome back, brave adventurer!
I was worried you wouldn’t return after locking horns with that terrible trio from the Lower Citadel. It warms my heart to have you back in my party, and where we’re going, we’re gonna need all the warmth we can get.
Let us now journey into the Upper Reaches to face the final three bosses we’ll need to defeat before challenging the Lich King himself. Keep your wits about you—they won’t be showing us any mercy!
The Upper Reaches
The Upper Reaches host Blood-Queen Lana’thel, Professor Putricide, and Sindragosa.
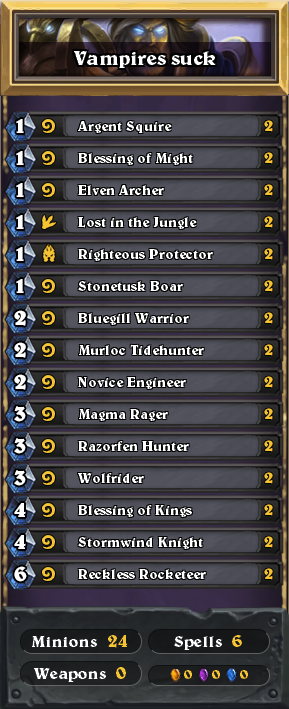
Blood-Queen Lana-thel
This neck-biting Blood Elf has a relatively straightforward hero power, Vampiric Leech. This allows her to deal three damage to any target she chooses, and heal herself for the damage dealt.
However, it is her secondary ability that poses a more significant threat: once her turn begins, she turns you into a vampire! Once you become a vampire, your hero power changes to “Vampiric Bite”. This zero-cost hero power gives a minion +2 health and attack, and must be used every turn on a minion who has not yet been “bitten”! That means if you don’t have a friendly target, you’ll have to buff one of her minions.
For this battle, we will call on the light of Uther. During this encounter, we want to always have minions available to target with Vampiric Bite.
Face is the place!!!
Since we will always be looking to make our minions bigger, we can keep up constant pressure.
Always have a back-up
Try to keep at least one minion in your hand that you can play to guarantee you’ll have a friendly target for your hero power.
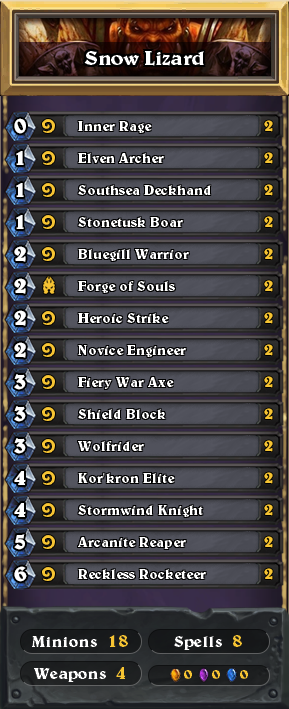
Professor Putricide
Professor Putricide changes several times throughout this encounter. He begins the battle with 15 armor and a hero power that makes all Secrets cost zero. Once his armor is gone, phase two begins. Putricide will summon Festergut: a 3/5 minion that deals three damage to all enemy minions at the end of the Professor’s turn. He also gains 15 more armor that you will need to remove to initiate the third and final phase.
Once entering his final form, Putricide summons Rotface. Rotface is a 4/6 minion that summons a random Legendary each time he survives damage. Ouch!
Choose the Ooze
Don’t let Growing Ooze get out of control. Trade early with these minions to keep their impact as low as possible.
It’s a Secret to . . . you!
Remember: the colors of the Secrets Putricide plays reflect what class they are from. Use this info to better guess what he could possibly have in store.
Pace yourself
Each phase brings a new challenge. Make sure not to push Putricide into his next phase until you’re ready.
Well done! All those potions and he couldn’t come up with one recipe for success. Well, now that Professor Putricide is out of the way, let’s head to the last boss before we ascend to the Frozen Throne.
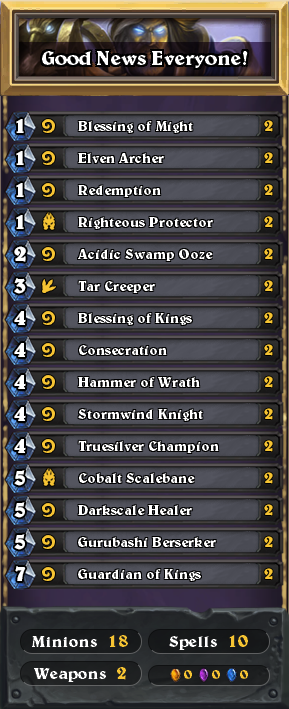
Sindragosa
Sindragosa lives up to her reputation as a cold-hearted dragon by turning your minions into blocks of ice! When her health drops to 20 and 10, she’ll change your minions on the board to ice cubes. Worst thing is, once they are frozen, there is no way to thaw them out! If your board is full when she hits 20 or 10 health, you won’t be able to play any more minions.
For assistance with this fight, we’ll be turning to Garrosh Hellscream.
Garrosh gives us options to attack without having any minions on the board when Sindragosa unleashes her storm.
Pow! Right in the kisser!
As Sindragosa has no real defensive tactics outside of turning your minions into blocks of ice, we can focus on bringing down her health. Just be careful as she nears 20 and 10 health.
Trades for days
Sindragosa will use her minions to attack yours. This allows you to keep your board low until you can reduce her health. Use your weapons to push her over the edge.
He nears! Now with Sindragosa out of the way, we can approach the Frozen Throne. Join me next time as we face off against the Lord of the Scourge himself. See you soon!